GC Checklist
Congratulations! You’ve ordered a modular elevator. The next step is to make sure the site is ready for the elevator. Below is a General Contractor checklist that outlines your scope of work.
"Shout out to Phoenix Modular Elevator, this is a fantastic solution if you have ever been held hostage by the elevator installation. This elevator was installed in one lazy afternoon."
~Warren H., President, Hayes Modular
Detailed steps to guide general contractors through the installation process.
Detailed Timeline
Dig and pour a concrete pit for the hoistway, with cast-in-place anchor bolts in the corners. Anchor bolt templates are available as an option to help make sure the anchor bolts are in the right place. You need to engineer the pit foundation and reinforcement based on the elevator’s pit reactions that our engineer supplies to you, the jobsite’s soil conditions, and your local code requirements. Please do NOT pour the pit until you have received structural calculations and drawings from PME.
Typical pits have 8” walls and 12” floors, but please see pit layout drawings for precise measurements for your job.
If you have a sump hole, cover it with a non-combustible material, typically a sheet of metal.
Next, pour a concrete slab for the modular machine room, if ordered, and bolt it to the foundation with epoxy anchors.
If the machine room is not adjacent to the hoistway, piping and electrical must be run underground or overhead. Coordinate with PME and the installer to determine any building preparations needed to accommodate this.
Lastly, once the pit has been poured and the anchor bolts are in place, download this Pit Drawing Form. Fill out all the blanks with exact measurements and make sure to include the project name at the top. Then, email the form to us. With this completed form, the holes for the anchors will be as accurate as possible.
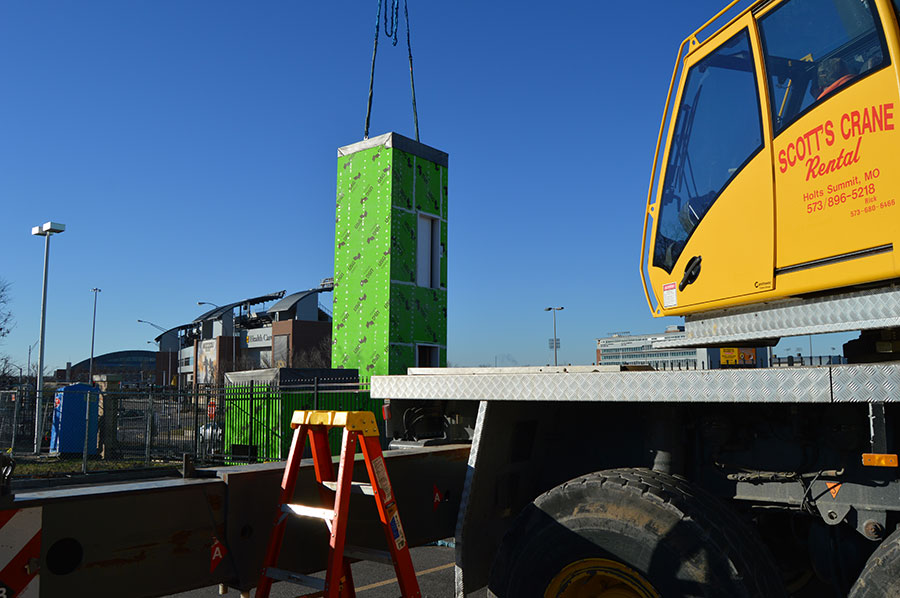
If this is new construction, retrofit or modular, and the elevator is going in after construction begins or through a roof, make sure that you leave 3″ in excess of the hoistway dimensions (out-to-out factory finish dimensions, which can be found on submittal drawings) on all sides, all the way to the pit to accommodate the hoistway being craned into the building.
Pour the PitMake proper rough openings at each landing. Refer to project drawings for precise width. They can be as narrow as the door opening or as wide as the entire front wall of the hoistway.
Barricade each landing in accordance with OSHA Standards.
Door PenetrationsIf you are building the machine room, provide for the following:
- Ensure machine room floor is complete and level, room is dry, walls are complete and fire rated with the same rating as the hoistway.
- Equip with overhead light, switch, and GFCI outlet.
- Install an exterior self-closing, self-locking door that is a minimum of 29.5” wide (36” preferred).
- Install electrical power, including disconnects (see Electrical section).
- Provide for climate control if the natural environment will not maintain the machine room temperature between 50 and 100 degrees, and humidity less than 85%. This is required for the controller to work properly and by Rule 2.7.9.2.
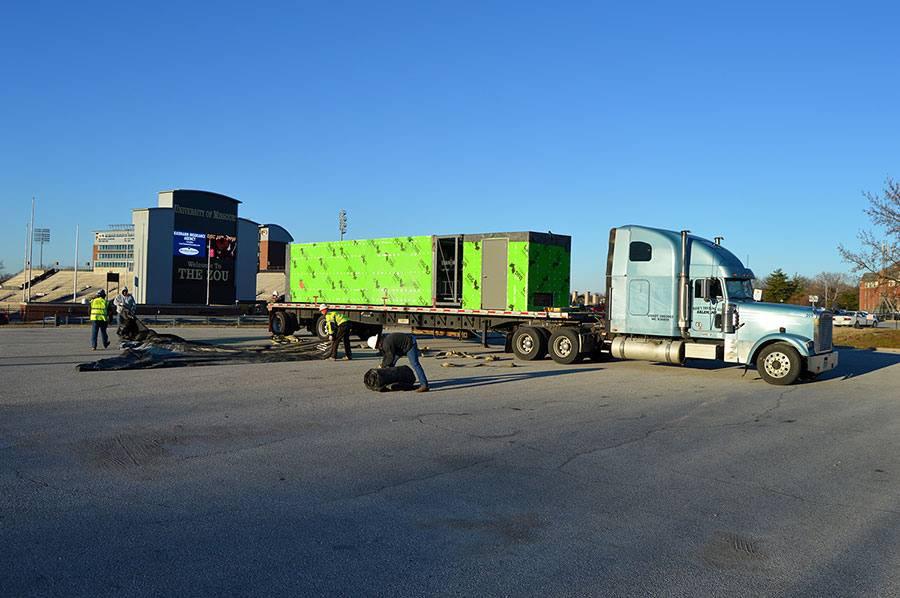
Crane Information
Truck Information
- Elevator power: 3-phase power, 208-480 volt dedicated circuit with lockable disconnect. Amperage requirements depend on project voltage and motor size. Contact us and we’ll provide job-specific starting and full-load amperage so that you can size the power feed and disconnect.
- Car power (lights and alarm): 120 volt, 20 amp dedicated circuit with lockable disconnect.
- Hoistway power (pit light and outlet): Two 120 volt, 20 amp dedicated circuits. Disconnect not required, as this can land directly into the controller.
- Machine room power (light and outlet): 120 volt, 20 amp dedicated circuit. Ties directly into room light and outlet. Add a second outlet under the controller if the unit is equipped with an enhanced emergency communications system.
- Climate Control: PME offers two options for climate control in our modular machine rooms. 1. PTAC unit: This unit needs a 208/230 volt, 20 amp dedicated circuit, wired directly into the outlet. 2. Mini-split: This unit needs a 208/230 volt, 20 amp dedicated circuit, wired directly into the outlet. Will need disconnect at the outside unit, by others.
Provide a dedicated phone line to the machine room (pre-2019 code only). The installer will connect this to the ADA phone in the elevator car. When operational, this line must provide two-way communications that are monitored 24 hours a day. See Rule 2.27.1.1.
**Please note the elevator phone is analog. If cellular or digital is needed, please speak with your telephone service provider for converter options offered.
Provide ethernet cable to machine room for visual and text emergency communication (2019 and later code only).
Install Automatic Fire Alarm Initiating Devices: As required by ASME A17.1 & NFPA – 72 or per local code.
Smoke Detectors: Install smoke detectors in each hallway and wire them to the building electrical supply. Your local AHJ may also require them in the machine room and/or hoistway. See elevator layout drawings for smoke detector wiring requirements. The installer will make the final connections of the smoke detectors to the controller.
Wiring should be brought into the machine room and terminated on 4 normally-closed contacts.
- Machine room FAID
- Main egress FAID
- All other lobbies FAID
- Any/all hoistway (pit and top of shaft) FAID
Fire Sprinklers: Local building codes may require fire sprinklers in the hoistway and/or machine room. If required in the machine room, you will also need a means to remove power from the equipment prior to sprinklers turning on (shunt trip). Consult your local code official for specific requirements. If sprinklers are required, they must be installed after the elevator installation is complete and must be installed in accordance with Rule 2.8.3 (ASME A17.1).
Hoistway Venting: IBC requires hoistway venting to the exterior for any building of more than three stories. Local jurisdictions may have additional requirements. See ASME/ANSI A 17.1. When required, PME supplies a dampered vent, which you will need to install and wire into building power.
Roof: Flash around the joint between the elevator and roof to prevent water penetration.
Exterior: If elevator is on the exterior of the building, or protrudes above the roof, apply final finish. Hoistway standard exterior is fiberglass gypsum type X sheathing (Densglass or equivalent), so any building finish may be applied directly. Standard roof is EPDM or Duro-Last that is glued to the roof and tacked around the sides. This should be terminated over the siding after finish is applied to the walls.
Interior: Any hoistway walls that are exposed on the interior may be taped, mudded and finished like any standard drywall. Tie hoistway walls into building walls and openings with drywall or expansion joints.
Floor: Install cab flooring. A ¾” allowance below the sill is provided. Extend building flooring to hoistway sill. An aluminum sill transition ramp is an available option.
Foundation: Flash bottom of hoistway to outside of pit wall, and the bottom of the machine room to slab.
Tie In and Finishing
Ground the hoistway by means of the provided lug, located in the pit on the interior of the hoistway.
Install non-shrink grout under the tower, jacks & buffer stands.
Patch any holes from piping and electrical wiring created by others in the hoistway and machine room walls to meet applicable building code fire rating requirements.
Install a Class ABC fire extinguisher in the machine room. See Rule 8.6.1.6.5.
We hope the General Contractor checklist above will help you with the modular elevator installation. It is our goal to make the process as easy as possible. If you have any suggestions or questions, feel free to contact us at your convenience.
General Contractor Quick Links
Things We Don't Do
- The floor of the elevator car. We do not provide carpet or tile and do not install it in the factory.
- Fire/Life/Safety – Fire/life safety equipment needs can be verified with your local AHJ.
- Coordination of various trades. It is up to you to schedule electrical, carpentry, construction, concrete work, fire/life/safety, building inspectors and plumbers (sump pump). You even need to coordinate with the elevator installer.
- Structural Connections – We can give advice and assistance but we do not make the tie-ins.
- Emergency Egress Phones – These phones are located at landings, not in the elevator cars.
- Sump Pumps – If requested, we can provide a receptacle and wiring but the pump is not in our scope.